
Quick Summary
To sharpen floral knife blades at home, clean the blade, inspect the edge, then draw it across a stone at a steady angle, alternating sides and removing the burr. Finish with a light hone and test the edge on newsprint.
- Clean sap and residue off the blade first so the stone does not skid.
- Use light, even pressure and draw the blade heel to tip in one stroke.
- Remove the burr with a few light strokes on the flat side of the stone.
- Test the edge by slicing newsprint; a clean edge passes without snagging.
- Have a deeply chipped blade professionally reground rather than grinding it at home.
Table of Contents
- Why a Dull Floral Knife Tears Stems and How to Spot It
- Floral Knife Sharpening Tools for a Small Curved Blade
- Preparing and Inspecting the Blade Before You Sharpen
- Floral Knife Sharpening Angle and How to Hold It Steady
- How to Hone a Floral Knife for a Clean Finish
- How Often to Sharpen a Floral Knife and Troubleshooting Uneven Results
- Booking Your Next Sharpening Kit from Toolpro
- Frequently Asked Questions
Why a Dull Floral Knife Tears Stems and How to Spot It
Last Updated: November 10, 2026
A floral knife that has lost its edge does more harm than most florists realise. Instead of slicing cleanly, it crushes and tears the stem, which damages the vascular tissue that carries water up to the bloom. That bruising shortens vase life. Learning how to sharpen floral knife blades at home is one of the cheapest ways to protect your stock and your margins.
Watch for the signs early. The knife drags through soft stems, leaves a ragged cut, or needs extra pressure to get through a stem it used to handle easily. Stems that look crushed at the cut end usually point to a blade that needs attention.
- The stem splits or frays instead of parting cleanly
- The knife slips or skids before it cuts
- Cut ends look bruised or brown within a few hours
- You press harder than you used to for the same stem
Do a quick paper test. Slice a sheet of newspaper. A sharp blade cuts through in one smooth pass. A dull one snags or tears.
Floral Knife Sharpening Tools for a Small Curved Blade
A floral knife is not a chef's knife. The blade is short, the edge is curved, and many florist knives are single-bevel or asymmetric, one side carries the bevel, the flat side is meant to run flush against the stem. That geometry changes which tool works. A wide flat bench stone gives you plenty of abrasive, but the curve means only a small section of edge contacts the stone at once, so control matters more than surface area. A tool that is too coarse or too wide encourages you to tilt the blade to reach the curve, which rounds the tip and thins the edge.
Three tool types suit a small curved blade, and each has a real trade-off:
- Fine ceramic rod or compact ceramic sharpener. Best for access to the curve and light maintenance. The fine grit removes little metal, so it is hard to ruin an edge, but it is slow on a genuinely dull blade. Our Ceramic Sharpener from Toolpro is a fine-grade option at 120mm long, priced at $15.00 AUD, and suits light touch-ups between sessions, see the ceramic sharpener page.
- Medium diamond sharpener. Faster cutting and stays flat, which helps on harder stainless. The trade-off is that medium diamond removes metal quickly, so a few careless strokes on a thin floral blade can change the bevel. The Eze Lap Sharpener - Medium ($38.00 AUD) is sized for small cutting tools like secateurs and snips; compare sizes on the Eze Lap medium sharpener page.
- Manual V-shaped pull-through sharpener. Cheap and beginner-friendly, but the fixed carbide or ceramic slots set their own angle and do not follow a curved or single-bevel edge well. They tend to remove more metal than necessary and can leave a ragged edge on a thin blade. Treat them as a field expedient, not a routine tool.
Match the tool to the condition of the edge:


- Light wear (drag only, no nicks): fine ceramic sharpener or rod.
- Noticeable dulling (tears stems, needs pressure): medium diamond sharpener, then refine on ceramic.
- Heavy damage or chips: have the blade professionally reground rather than grinding away metal at home.
Watch out: if your knife is single-bevel, do not sharpen both sides equally. Work the bevel side and only lightly remove the burr on the flat side, or you will destroy the asymmetric geometry that lets the blade run cleanly along a stem.
The article compares three tool types for a small curved floral blade, and the table below summarises how each one suits the job.
| Tool | Best for | Key difference |
|---|---|---|
| Fine ceramic rod or compact sharpener | Light wear and touch-ups | Removes little metal, slow on dull blades |
| Medium diamond sharpener | Noticeable dulling | Cuts faster, can change the bevel if careless |
| Manual V-shaped pull-through sharpener | Field expedient only | Fixed angle, poor fit for curved or single-bevel edges |
Preparing and Inspecting the Blade Before You Sharpen
Start by cleaning the blade. Sap and plant residue hide the true condition of the edge and can cause the stone to skid. Wipe the blade with a damp cloth, then dry it fully.
Next, inspect the edge under good light. Look for chips, nicks or rolled sections. Small nicks can be smoothed out at home, but a deep chip may need professional work.
Check the pivot and any locking mechanism too. A loose joint makes the blade wobble during sharpening, which leads to an uneven edge. If you are unsure what kind of cutting tool suits florist work, our guide on choosing the right secateurs for florists explains the differences.
Floral Knife Sharpening Angle and How to Hold It Steady
Hold the knife firmly in your non-dominant hand with the edge facing away from you, and keep your fingers clear of the path of the stone as you sharpen floral knife edges.
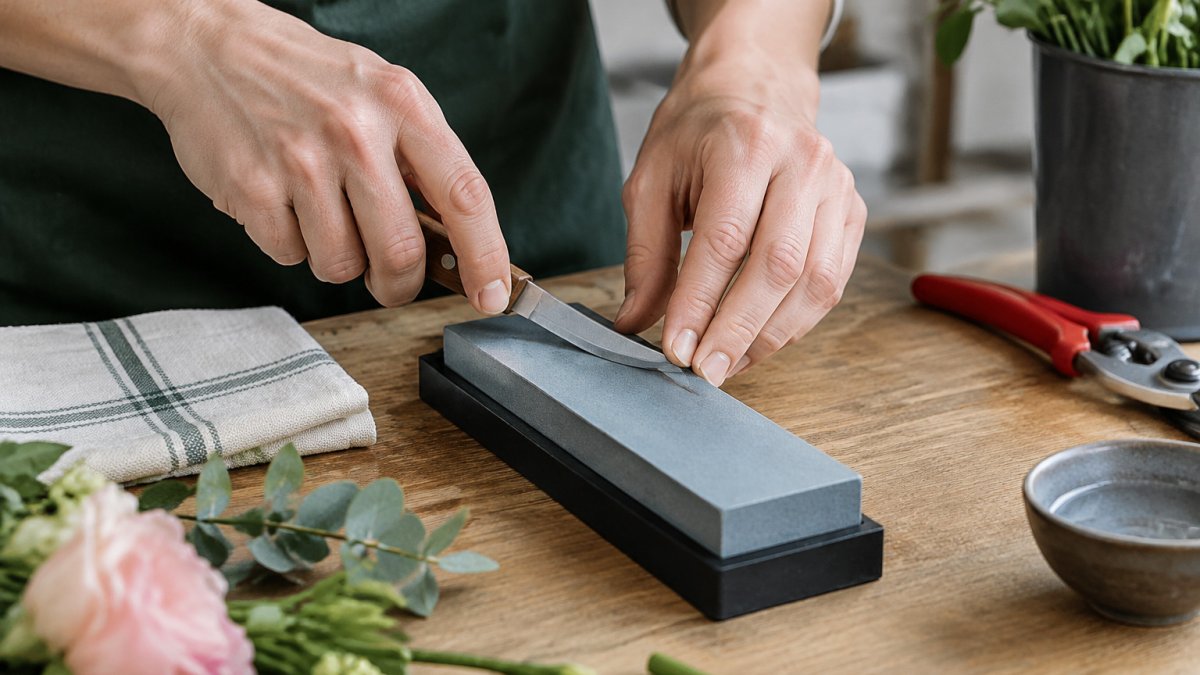
Aim for a consistent sharpening angle for your knife. A steady angle matters more than a perfect number. Rock the blade slightly to match the curve so the whole edge contacts the stone.
Keep your wrist locked and move from the shoulder. This gives you more control than moving the wrist alone.
Drawing the Blade Across a Sharpening Stone
Place the stone on a non-slip surface. Lay the blade on the stone at your chosen angle, then draw it across the surface in one smooth stroke, from heel to tip. Lift and repeat from the heel each time.
Use light, even pressure. Heavy pressure does not sharpen faster. It only wears the stone unevenly and can damage the edge.
Work each side the same number of times. Alternate sides so the edge stays balanced.
Removing the Burr and Checking the Edge
After several strokes on each side, you will feel a thin ridge of metal along the opposite edge. This is the burr. Remove it with a few light strokes on the flat side of the stone, moving away from the edge.
Then repeat the paper test. A clean edge slices through newsprint without snagging. If it still tears, go back to the stone for a few more strokes.
How to Hone a Floral Knife for a Clean Finish
Honing refines the edge after sharpening. It does not replace sharpening, but it keeps the edge crisp between sessions.
Use a fine ceramic rod or a fine-grit tool. Draw the blade lightly across it at the same angle you used for sharpening. Work from heel to tip, once or twice per side.
Stop when the edge feels smooth and the paper test passes cleanly. Over-honing can round the edge, so keep strokes light.
How Often to Sharpen a Floral Knife and Troubleshooting Uneven Results
Frequency depends on use and on how the knife is treated between sessions. A florist cutting stems every day may need a light touch-up weekly and a fuller sharpen every few weeks, while occasional home users may only need attention every few weeks, or whenever cuts begin to drag.
Between sessions, protect the edge rather than re-sharpen it. Wipe sap and plant residue off the blade after use, dry it fully, moisture and sap accelerate corrosion on thin stainless, and store it closed or in a sheath so the edge is not knocking against other tools in a drawer.
When results are uneven, diagnose before you grind more metal:
- Rolled edge. The edge feels sharp on one side but drags immediately. Hold the blade under good light and look along the edge, a rolled section reflects light differently and may look slightly wavy. Correct it with a few light, consistent strokes at your chosen angle, then remove the burr. Do not try to fix a roll with heavy pressure.
- Inconsistent bevel. The bevel looks wider in one place than another, or the marker test wears unevenly. Mark the bevel with a marker, sharpen until the marker wears off evenly, and keep your wrist locked and your movement from the shoulder. If the blade is single-bevel, remember the flat side gets only burr removal.
- Excessive burr. A large burr feels sharp but folds over and cuts poorly. It usually means too many strokes on one side or too much pressure. Alternate sides more often, lighten your strokes, and finish with a few light passes on the flat side to remove the burr.
- Blade still drags after sharpening. Check the whole edge, not just the middle, the curve near the tip is easy to miss. Also check for a worn or clogged stone: a flattened or loaded stone cannot cut properly, so clean it or replace it.
- Chips or nicks remain. Small nicks can be smoothed at home, but a deep chip needs professional regrinding; grinding it out by hand removes too much metal and changes the blade profile.
Test performance the way you will use the knife, not on your hand. A controlled paper cut, a single smooth pass through newsprint, tells you whether the edge is clean. Then make one clean cut on a sacrificial stem and inspect the end: a sharp floral knife leaves a smooth, unbruised cut, while a dull or damaged edge crushes or frays the stem.
For more on keeping professional cutting tools in good condition between sharpenings, read our guide on maintaining professional pruning secateurs. Our article on sharpening professional garden shears also covers similar techniques if you want to compare methods.
Booking Your Next Sharpening Kit from Toolpro
A sharp floral knife protects your stems, your time and your profit. At Toolpro, we stock sharpeners sized for small curved blades, from the $15.00 AUD ceramic sharpener for quick touch-ups to the $38.00 AUD Eze Lap medium sharpener for regular maintenance.
Start with a fine ceramic sharpener and a medium diamond stone, then build your routine from there. Search our range today to find the right sharpener for your floral knife.
Frequently Asked Questions
How do you sharpen a floral knife at home?
Clean and dry the blade, then set a sharpening stone on a non-slip surface. Hold the knife at a steady edge angle, draw the bevel across the stone from heel to tip with light, consistent strokes, and repeat on the other side. Finish with a few light passes on a finer stone or a honing rod to clear the burr. Test the result on a stem: a sharp floral knife makes a clean cut without tearing the fibres. Work slowly, keep fingers well clear of the edge, and stop once the cut is clean.
What is the best tool for sharpening a floral knife?
For a small curved blade, a fine-grit sharpening stone or a manual V-shaped sharpener gives the most control. Toolpro's Ceramic Sharpener (AUD 15.00, 120mm long, fine grade) suits regular edge maintenance on small blades. The Eze Lap Medium diamond sharpener (AUD 38.00) is a medium-grit option for general edge maintenance. Choose a tool that fits the blade's curve and keeps the bevel flat against the surface.
What angle should you use to sharpen a floral knife?
Most floral knives are sharpened at a shallow edge angle, though the exact figure depends on the bevel. Lay the blade flat, lift the spine until the bevel sits evenly on the stone, then hold that angle through every stroke. Keeping the angle consistent matters more than hitting a precise number, because a changing angle leaves an uneven edge. Check the bevel visually after a few strokes to confirm it is making full contact.
How often should you sharpen a floral knife?
Frequency depends on how much you cut and what you cut. Occasional home users may only need to sharpen every few weeks, while professional florists handling large volumes may need a light hone every day or two. Sharpen when the blade starts to drag through stems, crush rather than slice, or leave ragged cut ends. Regular light honing between full sharpening sessions extends the time between proper sharpening and keeps the edge clean.
