
Table of Contents
- Why Maintaining Pruning Secateurs Matters
- How to Clean Pruning Secateurs After Each Use
- How to Sharpen Pruning Secateurs
- How to Disinfect Pruning Tools
- Lubricating Blades and Moving Parts
- Checking and Adjusting the Pivot and Spring
- Using Secateur Replacement Parts
- A Repeatable Maintenance Schedule
- Frequently Asked Questions
Last Updated: October 9, 2026
Why Maintaining Pruning Secateurs Matters
Professional pruning secateurs are precision instruments. They demand care to stay sharp and reliable. Neglect them, and you'll notice dull cuts, slower work, and frustration creeping in.
Here's the reality: how to maintain professional pruning secateurs determines how long your tools last and how well they perform. A $50 secateur that's properly maintained will outlast a $150 one that's ignored. The difference isn't the tool, it's the maintenance routine.
Simple, repeatable care helps florists, nursery operators, and gardeners extend the life of their secateurs. The same practices work whether you're pruning delicate orchids or managing vineyard stock.
This guide walks you through every step of secateur maintenance: cleaning, sharpening, disinfection, lubrication, and adjustment. You'll learn what to do, why it matters, and when to replace parts instead of fighting with worn-out tools.
How to Clean Pruning Secateurs After Each Use
Cleaning your secateurs immediately after use is non-negotiable. Sap hardens fast. Plant residue traps moisture. Both lead to rust and blade degradation within days.
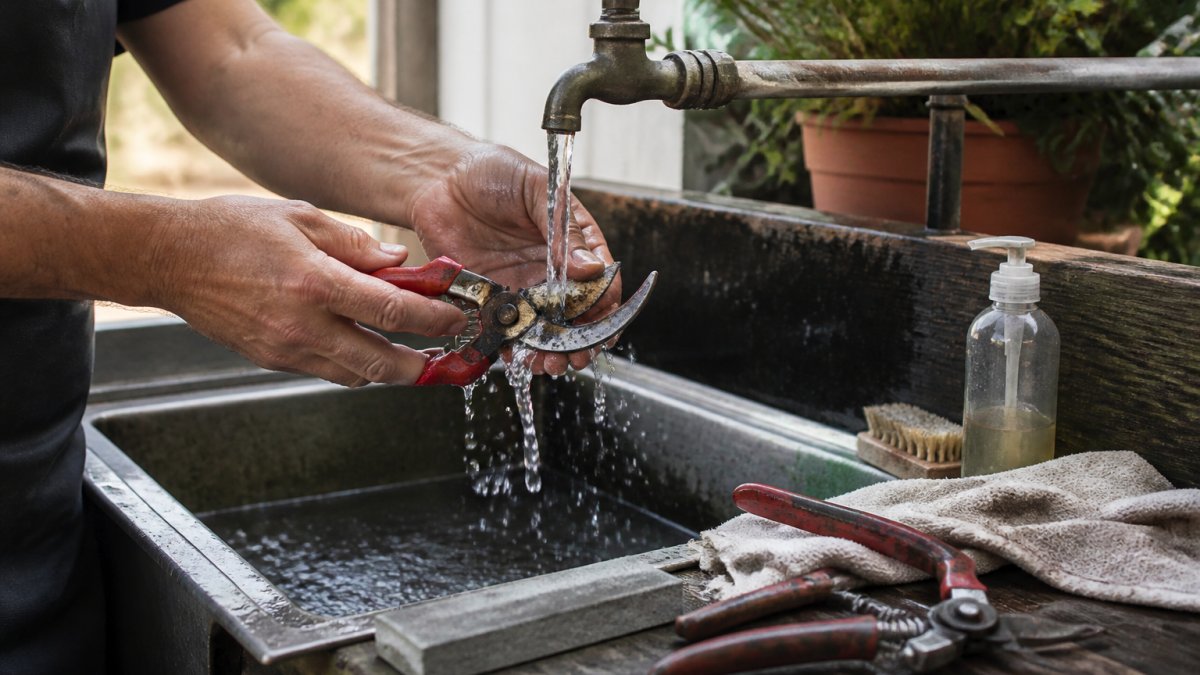
The basic routine takes 90 seconds. Grab a damp cloth or soft brush. Wipe the cutting blade, the anvil or bypass surface, and the handles.
For stubborn sap buildup, use a soft-bristled brush or old toothbrush. Gentle pressure works better than scrubbing hard, which can scratch the blade edge.
Never use steel wool or abrasive scrubbers on the cutting blade itself, you'll damage the edge. Steel wool is fine for the handle or spring if rust appears there.
Removing sap and plant residue
Sap is your biggest enemy. It's acidic, it attracts moisture, and it hardens into a sticky coating that prevents the blades from closing properly.
Wipe sap off immediately after cutting. A dry cloth works. For fresh, wet sap, a damp cloth is faster. If sap has already dried, soak the area in warm water for 5-10 minutes, then wipe or brush gently.
Some gardeners swear by lemon juice or a mild vinegar solution for stubborn sap. These work because the acidity breaks down the plant residue. Dampen a cloth with either, wipe the affected area, and follow with a dry cloth.
Plant debris, leaves, bark, flower stems, also traps moisture. Brush or wipe it away during your post-use clean. A quick visual check takes seconds and prevents rust weeks later.
Removing rust and discoloration
Rust appears as brown or orange spots on the blade or handle. Discoloration, dark streaks or staining, often comes from mineral deposits or old sap residue.
For light surface rust, use fine-grit sandpaper (220-400 grit) or steel wool on the affected area. Sand gently in one direction, following the blade's natural edge angle. Wipe away dust with a damp cloth, then dry completely.
For deeper rust pitting, you've waited too long. The pit won't disappear with light sanding. Consider replacement parts at this point, a new blade set costs less than a new tool and restores full performance.

Discoloration from mineral deposits responds to the same lemon juice or vinegar trick used for sap. Dampen a cloth, wipe the discoloured area, and dry. If staining persists, it's cosmetic only and doesn't affect cutting performance.
How to Sharpen Pruning Secateurs
A sharp blade is the difference between clean cuts and crushing damage. Dull secateurs tear plant tissue, which slows healing and invites disease. You'll also feel the strain in your hands and wrists after an hour of work.
Sharpening isn't difficult. It takes 5-10 minutes and a basic tool. Most people sharpen their secateurs every 2-4 weeks of regular use, depending on how much cutting they do and what they're cutting through.
Choosing a sharpening tool
Three types of sharpeners work well for secateurs: ceramic sharpeners, diamond sharpeners, and carbide sharpeners.
A ceramic sharpener is affordable and portable. The Toolpro Ceramic Sharpener at $15.00 is 120mm long with a fine grade suitable for secateur blades. It's ideal if you sharpen once a month or less.

A diamond sharpener like the Eze Lap Sharpener (Medium) at $38.00 is faster and more durable. Diamond grit cuts through steel quickly, making it a good choice if you sharpen weekly or work with very dull blades.
A carbide sharpener like the Bahco Sharpener at $50.00 has carbide inserts that restore the edge of all cutting tools.
For most home users and occasional professionals, a ceramic or diamond sharpener is sufficient. For high-volume work (nurseries, florists, commercial gardeners), a carbide sharpener saves time.
Sharpening the cutting blade step by step
Before you start, identify which blade is the cutting blade.
Step 2: Identify the blade angle. Look at the edge of the cutting blade. It has a bevel, a sloped edge.
Step 3: Position the sharpener. Hold your chosen sharpener at the same angle as the blade edge. This is the critical step.
Step 4: Sharpen with light pressure. Draw the sharpener along the blade edge from the base (near the pivot) toward the tip.
Step 5: Check your progress. Wipe away any metal dust. Hold the blade up to light and look at the edge.
Step 6: Test the blade. Close the secateurs gently on a piece of paper or a thin twig. A sharp blade cuts cleanly.
Step 7: Clean and dry. Wipe away all metal dust with a damp cloth. Dry completely before storing.
How to Disinfect Pruning Tools
Disinfection prevents disease spread between plants. If you're pruning diseased plants or moving between different gardens, disinfection is essential.
Use a 10% bleach solution: one part household bleach to nine parts water. Soak a cloth in this solution and wipe the entire blade, handles, and any crevices. Let it sit for 30 seconds, then wipe with a clean, damp cloth to remove bleach residue. Dry immediately.
For high-risk situations (moving between commercial nurseries, pruning diseased stock), use a stronger 20% solution or a dedicated disinfectant spray designed for garden tools. Follow product instructions carefully.
Disinfect at the start of each day if you're working across multiple gardens, or between jobs if you're pruning diseased material. It takes two minutes and prevents costly plant loss.
Lubricating Blades and Moving Parts
Lubrication keeps your secateurs smooth and prevents rust. The pivot point, where the two blades meet, needs attention most. The spring and handles benefit too.
Use a light machine oil or a dedicated tool oil. Apply a small drop to the pivot point. Open and close the secateurs 10 times to distribute the oil. Wipe away excess with a clean cloth.
Don't over-oil. Excess oil attracts dust and gums up over time. A single drop per month is enough. If your secateurs feel stiff or the spring is sluggish, add one drop of oil and work it in by opening and closing the tool repeatedly.
For the blade edges themselves, light oil prevents rust but can interfere with cutting if too much builds up. A thin coat is fine; wipe away visible pooling.
Checking and Adjusting the Pivot and Spring
The pivot is the bolt or pin holding the two blades together. Over time, it can loosen, causing the blades to wobble or not close properly.
Check the pivot: Hold the secateur with the blades pointing down. Gently try to move the blades side to side. There should be almost no movement.
Tighten the pivot: Use a small screwdriver or Allen key (depending on your secateur design) to tighten the pivot bolt. Turn clockwise.
Check the spring: Open the secateurs fully and release. The spring should snap the blades open with smooth, consistent force.
Adjust blade tension: Some secateurs have a tension adjustment screw separate from the pivot. This controls how much force you need to close the blades.
If the spring is broken or the pivot is damaged beyond tightening, replacement parts are your best option.
Using Secateur Replacement Parts
Quality replacement parts extend the life of your secateurs significantly. Instead of buying a new tool, you can replace just the worn component.
Blade sets are the most common replacement. The ARS Replacement Blade Set (Medium) at $58.00 is designed for ARS medium professional secateurs. A new blade set restores sharpness and cutting performance instantly.
Springs wear out after years of use. A replacement spring restores the smooth opening action that makes pruning less tiring.
Handles and grips can be replaced if they crack or wear smooth. Worn grips reduce control and increase hand fatigue.
Before ordering replacement parts, identify your secateur brand and model. Having the right parts on hand means zero downtime, swap a worn blade set in two minutes and keep working.
A Repeatable Maintenance Schedule
Consistency matters more than intensity. A five-minute routine done weekly beats a one-hour deep clean done once a year.
| Task | Frequency | Time |
|---|---|---|
| Wipe blades and handles after use | Daily (after each pruning session) | 2 minutes |
| Brush out sap and plant debris | Daily | 1 minute |
| Oil the pivot and spring | Weekly or monthly | 1 minute |
| Check pivot tightness | Monthly | 2 minutes |
| Sharpen the cutting blade | Every 2-4 weeks (depending on use) | 10 minutes |
| Disinfect (if moving between gardens) | As needed | 2 minutes |
| Deep clean (remove rust, inspect spring) | Every 3 months | 15 minutes |
Daily: After each pruning session, wipe the blade with a dry cloth. Remove visible sap and plant debris. This single habit prevents 80% of maintenance problems.
Weekly or monthly: Add one drop of oil to the pivot. Open and close the secateurs 10 times. Wipe away excess.
Every 2-4 weeks: Sharpen the blade. The frequency depends on how much cutting you do and what you're cutting. Soft stems need less frequent sharpening than woody branches.
Monthly: Check that the pivot bolt is snug. Tighten slightly if needed. Listen for any unusual sounds when opening and closing, they signal wear.
Every 3 months: Do a deeper inspection. Look for rust on the blade or handle. Check that the spring feels responsive.
This schedule keeps your secateurs in top condition with minimal effort. Professional florists and nursery operators often sharpen weekly or even daily during peak seasons.
Frequently Asked Questions
How often should you sharpen pruning secateurs?
Professional users should sharpen secateurs every 4-6 weeks of regular use, or sooner if you notice the cutting blade becoming dull or crushing rather than cleanly slicing plant stems. Home gardeners using tools occasionally may sharpen every 2-3 months. The frequency depends on how much you prune and what you cut. Harder or woody stems dull blades faster than soft foliage. If your secateurs produce ragged cuts instead of clean ones, sharpen immediately regardless of the schedule.
Can I use rubbing alcohol to clean and disinfect pruning secateurs?
Yes. Rubbing alcohol (70% isopropyl) is effective for disinfecting secateurs and removing sap residue. Wipe the blades and moving parts with a cloth dampened in rubbing alcohol, then dry thoroughly to prevent rust. This method works well for disease prevention between cuts, especially when moving between plants. For heavier sap buildup, soak the blades briefly or use a soft brush with the alcohol. Always dry completely after disinfection to protect the steel blade and prevent corrosion.
What oil should you use on pruning secateurs?
Use light machine oil, 3-in-1 oil, or horticultural oil on the pivot, spring, and moving parts of your secateurs. Apply a small amount to the joint where the blades meet and work it in by opening and closing the tool several times. Avoid heavy oils that attract dirt and dust. Wipe away excess oil with a clean cloth. Oil every 2-4 weeks during active use, or whenever the tool feels stiff. Never oil the cutting blade edge itself, as this can reduce cutting performance and attract contaminants.
When should pruning secateurs be repaired or replaced?
Replace secateurs if the cutting blade is bent, cracked, or cannot be sharpened back to effectiveness, or if the spring is broken and no longer holds the blades together. Consider professional servicing if the pivot is damaged or the blades are misaligned. Many professional secateurs accept replacement blade sets, making repair more affordable than replacement. Check whether your model has available secateur replacement parts before discarding the tool. Storage in a dry environment and regular maintenance can extend the life of quality secateurs by many years.
Maintaining professional pruning secateurs isn't complicated, it's just consistent. A few minutes of care each week prevents rust, keeps your cuts clean, and saves you from buying new tools every year. At Toolpro, we've designed our sharpeners and replacement parts to make this maintenance simple and affordable. Start with the daily wipe-down habit. Add weekly oiling. Sharpen every few weeks. Your hands, and your plants, will thank you.