
Table of Contents
- Why Thin Stems Demand a Different Kind of Snip
- Quick Comparison: What to Look For in Snips for Thin Stems
- Straight vs Curved Blade Snips: Which Cut Suits Your Work?
- Ergonomic Snips for Repetitive Cutting: Reducing Hand Fatigue
- How to Sharpen Pruning Snips (and Keep Them Cutting Clean)
- Left-Handed Users and Specific Plant Compatibility
- Long-Term Cost of Ownership: Spare Parts and Durability
- Frequently Asked Questions
Last Updated: October 1, 2026
Why Thin Stems Demand a Different Kind of Snip
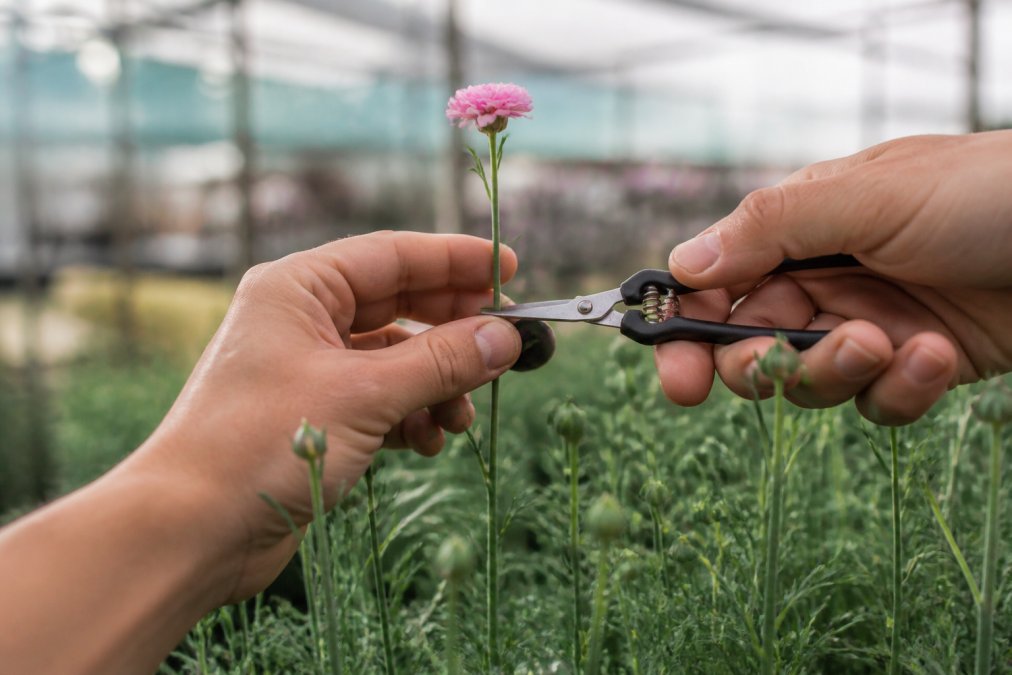
Soft-stemmed plants bruise rather than cut when the blade is too thick, and that bruising is what shortens vase life. If you are searching for the best professional snips for thin stems, the deciding factor is blade geometry, not brand or price. At Toolpro, we supply cutting tools to florists, orchid growers and nursery teams who cut soft growth all day, and the same problem comes up repeatedly: a standard pair of secateurs is simply too bulky for the job.
Quick Comparison: What to Look For in Snips for Thin Stems
Match the tool to stem diameter first, then to how long you will hold it. A hand-held pruner built for woody growth has a cutting capacity measured in centimetres; a floral snip is measured in millimetres. Buying one tool for both jobs usually means compromising on the delicate work.
| Feature | Best for thin stems | Why it matters |
|---|---|---|
| Blade type | Bypass, straight or curved | Slices cleanly instead of crushing |
| Blade material | Stainless steel or high-carbon | Holds an edge, resists sap corrosion |
| Blade thickness | Slim profile | Reaches into tight flower heads |
| Handle | Spring-loaded, ergonomic grip | Reduces hand fatigue over long sessions |
| Lock | Safety lock | Prevents damage in storage and transit |
| Spare parts | Replaceable spring and blades | Extends tool life |
Straight vs Curved Blade Snips: Which Cut Suits Your Work?
The choice between straight and curved blades comes down to access and stem anatomy, not preference. Straight bypass pruners give you a direct line of sight to the cut, which suits bench work and harvesting. Curved blades angle the cutting edge away from the handle, letting you reach into a crowded bunch without bending your wrist. On thin stems the difference is measurable: a straight blade meets the stem at roughly 90 degrees, while a curved blade approaches at an angle that lets you roll through the tissue rather than pinch it.
When Straight Blades Win
Straight blades suit deadheading, cutting stems to length on a bench, and any job where you need to see exactly where the blade meets the stem. Extra slim blades in a straight configuration are the standard choice for orchid work and delicate plant work, because you can place the cut precisely without disturbing surrounding growth.
When Curved Blades Win
Curved blades win when stems are crowded or angled away from you. Cutting roses from a dense bush, trimming a hanging basket, or working inside a propagation tray all favour a curved edge. The curve also lets you roll the blade through the stem rather than squeezing, which produces a cleaner cut on soft stems.
Matching Blade Geometry to Stem Type
A useful rule of thumb is to match the blade to how the stem grows, not just how thick it is:
- Erect, single-stem flowers (stock, snapdragon, gladiolus): straight slim blade, cut square
- Clustered or spray flowers (roses, carnations, chrysanthemums): curved blade to reach into the bunch
- Trailing or vining stems (sweet pea, ivy, jasmine): curved blade, roll-cut technique
- Hollow or pithy stems (dahlia, delphinium, lupin): straight blade, single clean pass
- Woody herbs (rosemary, lavender, thyme): bypass secateurs, not floral snips
Blade Angle and Cut Quality on Thin Stems
The angle at which the blade meets the stem determines how much tissue is crushed. A blade that approaches at a shallow angle slices through the vascular bundles; a blade that meets the stem square can compress them before the edge bites. Most professional florists find that a slight roll-cut, drawing the blade across the stem as it closes, produces the cleanest result on stems under 5 mm, regardless of whether the blade is straight or curved.
Ergonomic Snips for Repetitive Cutting: Reducing Hand Fatigue
Hand fatigue is the hidden cost of professional cutting, and it shows up long before your hands actually hurt. A tool that forces you to squeeze hard, or that sits too far from your palm, makes every cut slightly more effortful. Over a full day of arrangement preparation, that adds up to real strain. Ergonomic snips for repetitive cutting address this through handle shape, spring tension and overall weight rather than through a padded grip alone.
Look for these specifics:
- Tension adjustment that lets you lighten the spring as your grip tires
- Handle use designed so the blade closes before your fingers reach full compression
- A spring-loaded mechanism that opens the blade fully without you pushing it apart
- A handle sized to your hand, since an oversized grip forces you to reach
How to Sharpen Pruning Snips (and Keep Them Cutting Clean)
Sharp snips cut with less force, which protects both the plant and your hands. Learning how to sharpen pruning snips properly takes about ten minutes once you have the right file or sharpener, and it is the single highest-return maintenance task you can do. A dull blade crushes stems, and a crushed stem is a stem that will not last.
- Disassemble if the manufacturer allows it, or open the blades fully.
- Hold the blade steady and match the existing bevel angle. Do not invent a new angle.
- Draw a fine diamond file or sharpener along the bevel in one direction, away from the edge.
- Count your strokes and repeat the same number on the other side.
- Wipe the blade, check for burrs, and test on a scrap stem.
- Reassemble, then set the tension adjustment so the blades close smoothly without binding.
Cleaning and Sterilising Between Uses
Sap is the main enemy of stainless steel blades. It hardens, pulls the blades apart slightly, and turns a clean cut into a crush. Wiping the blades down at the end of each session removes most of it. For sterilisation between plants, use a recognised horticultural disinfectant and follow the label directions, particularly when you move between propagation stock.
Left-Handed Users and Specific Plant Compatibility
Most snips are built for right-handed use, and left-handed cutters feel it immediately. A bypass blade has a hooked lower edge and a sharp upper edge, and that orientation is set for one hand. Using a right-handed pair in your left hand rolls the stem away from the blade instead of into it, which means more crushed cuts and more effort per stem.
What to Check on a Left-Handed Model
- Blade orientation: the sharp upper edge should face the same way as a right-handed tool mirrored, not rotated
- Lock position: a lock that sits under the right thumb on a standard tool will sit under the wrong finger on a mirrored one
- Spring return: the spring should open the blade away from your palm, not into it
- Handle contour: a left-handed handle has the palm swell on the opposite side; a symmetrical handle is a compromise, not a solution
A common pattern is for left-handed growers to buy an ambidextrous anvil snip because it is the only option on the shelf. It works, but it is not the same as a properly mirrored bypass tool, and the difference shows up in cut quality on thin stems within a single session.
Matching the Tool to the Plant, Not Just the Stem
Plant compatibility follows the same logic as blade geometry. The tool that suits an orchid is not the tool that suits a woody herb, even if both stems are thin:
- Orchids and fine flowers: slim straight blades, light spring, cut square to avoid crushing the node
- Cut flowers and foliage: curved bypass, medium spring, roll-cut technique
- Succulents and soft-stemmed plants: sharp bypass with a thin blade; anvil snips crush the water-rich tissue
- Nursery propagation: sharp bypass with replaceable blades, sterilised between plants
- Woody herbs (rosemary, lavender, thyme): a separate pair of bypass secateurs, not your floral snips
- Hollow stems (dahlia, delphinium): straight slim blade, single clean pass to avoid collapsing the stem
Long-Term Cost of Ownership: Spare Parts and Durability
The cheapest pair of snips is rarely the cheapest to own. A tool with a replaceable spring, replaceable blades and an adjustable pivot can be rebuilt for years. A sealed tool with a riveted pivot gets thrown away the first time the spring fails.
Frequently Asked Questions
What scissors should I use to cut flower stems?
For thin, soft flower stems, use bypass snips with slim, sharp blades rather than household scissors. Bypass blades slice cleanly like scissors, while anvil snips crush the stem. Look for stainless steel blades, a spring-loaded mechanism and a safety lock. For woody or thicker stems, switch to a heavier hand-held pruner. Matching the tool to stem thickness protects plant health and gives a cleaner cut for arrangements.
Why are straight-blade snips preferred for thin stems?
Straight blades let you see the exact cut point, which matters for precision trimming of delicate stems. They suit tight spaces in bouquets and allow fine control for deadheading and harvesting. Curved blades are better for reaching into dense foliage, but for thin stems where accuracy is everything, straight blades usually give the cleanest, most controlled result.
How do professional snips differ from standard garden shears?
Professional snips use harder stainless steel blades, tighter pivot points and spring-loaded mechanisms that hold tension longer. They also offer replaceable springs and blades, so the tool lasts years rather than months. Standard garden shears often use softer metal that dulls quickly and crushes thin stems instead of slicing them cleanly.
How do I maintain professional-grade pruning snips?
Wipe blades after every use to remove sap, then dry fully to prevent corrosion. Sharpen regularly with a diamond file or sharpening stone, following the blade's original angle. Apply a drop of oil at the pivot point and check tension adjustment. For sap-heavy work, clean more often. Storing snips dry and locked extends garden tool longevity and keeps cuts clean.
Thin stems punish the wrong tool, and the damage shows up as short vase life and tired hands rather than an obvious failure. Toolpro supplies professional-grade snips, secateurs and floral scissors alongside the sharpeners and spare parts that keep them cutting cleanly, so you can match the blade to the stem instead of making one tool do everything. Browse the Toolpro range to find snips suited to your stems, your grip and your volume, and keep a spare spring on the shelf.