
Last Updated: October 25, 2026
Quick Summary
Clean cuts plant disease prevention works by stopping pathogens from entering damaged tissue. Sharp blades create wounds that seal naturally within days, while rough cuts crush plant cells and leave jagged edges that attract fungi and bacteria. Making one firm, smooth cut with proper positioning just outside the branch collar prevents infection from taking hold.
- Sharp blades cut cleanly without crushing tissue, allowing wounds to seal within days
- Position cuts just outside the branch collar on woody stems or 5 millimetres above a bud at 45 degrees on smaller stems
- Disinfect pruning shears between plants with 70% rubbing alcohol or diluted bleach for at least 30 seconds
- Never compost diseased leaves, stems, or fruit; bin or burn all infected material away from the garden
- Sharpen secateurs at least twice per season when cuts become rough or crushing occurs
Table of Contents
- Why clean cuts matter for plant disease prevention
- Pruning diseased branches safely and effectively
- How to disinfect pruning shears between plants
- Cleaning pruning tools between plants to stop cross-contamination
- How to sharpen pruning shears for precision cuts
- Disposing of infected plant material correctly
- Selecting and maintaining tools for disease prevention
- Frequently Asked Questions
Why clean cuts matter for plant disease prevention
Clean cuts plant disease prevention works by stopping pathogens from entering damaged tissue. When you make a rough cut, you expose raw plant cells and create an open wound. Pathogens like fungi and bacteria colonise these wounds and spread through the plant.
The difference is measurable. Rough cuts crush plant cells and leave jagged edges. These damaged cells leak sap and attract disease organisms. Clean cuts seal naturally within days. The plant compartmentalises the wound and moves on.
Think of it this way: a torn edge is an invitation to infection. A clean cut is a closed door. At Toolpro, we provide quality pruning equipment for orchid growers, nurseries, and florists.
Preventing plant disease with clean cuts works because:
- Sharp blades cut cleanly without crushing tissue
- Clean wounds close faster and resist infection
- Proper disinfection stops pathogens spreading between plants
- Regular maintenance keeps tools performing at peak efficiency
Pruning diseased branches safely and effectively
Removing diseased wood is only half the job. How you make the cut determines whether the wound closes cleanly or becomes a new entry point. Most guides stop at 'cut below the infection', the mechanics below are what separate a clean cut from a rough one.
Where to cut: three placements that matter
1. Branch collar cuts (woody stems and branches). The branch collar is the swollen ring of tissue where a branch meets the trunk or parent stem.
2. Bud cuts (smaller stems and canes). When cutting back to a bud, position the blade about 5 millimetres above the bud, on the side away from the bud.
3. Node cuts (soft tissue and herbaceous plants). Cut just above a leaf node or growing point, leaving enough tissue to seal. Avoid cutting through the middle of an internode on hollow or pithy stems, where pathogens can move freely through the open core.
How to cut without tearing tissue
A clean cut is one pass with a sharp blade. Tearing happens when:
- The blade is dull and crushes rather than slices
- You use a rocking or twisting motion instead of a single firm squeeze
- The anvil (the flat lower blade on bypass secateurs) is misaligned
- You cut wood too thick for the tool, secateurs are for stems up to roughly 15 millimetres; anything larger needs loppers or a pruning saw
Place the stem deep in the jaws, close to the pivot, where leverage is greatest. One firm, smooth squeeze. If the blade doesn't complete the cut in one motion, reposition or switch to a larger tool rather than forcing it.
When pruning is the wrong approach
Pruning is appropriate for discrete, localised infections on woody plants. It is not always the right call:
- Systemic infections (some vascular wilts and viruses) may already have spread beyond visible symptoms, pruning can spread the pathogen further on the blade.
- Highly contagious diseases on valuable plants may warrant removing and disposing of the whole plant rather than risking spread.
- Uncertain diagnosis, if you cannot identify the problem, get a diagnosis before cutting. Pruning the wrong tissue can remove healthy growth and fail to address the cause.
Work systematically: remove dead and crossing wood first, then diseased tissue, then open the canopy for airflow. Clean and disinfect between each plant, and between cuts when working on heavily infected material. Maintaining this level of vigilance is essential when troubleshooting plant diseases that often persist in the soil or within the bulbs of sensitive crops.
Steps for safe diseased branch removal:
- Identify the diseased section and trace it back into clean wood
- Cut below visible symptoms, depending on the pathogen
- Position the cut just outside the branch collar (or 5 millimetres above a bud at 45 degrees)
- Make one firm, smooth cut, never tear or twist
- Remove all infected leaves and fruit in the same area
- Disinfect the blade before moving to the next plant
- Dispose of all infected material away from the garden
How to disinfect pruning shears between plants
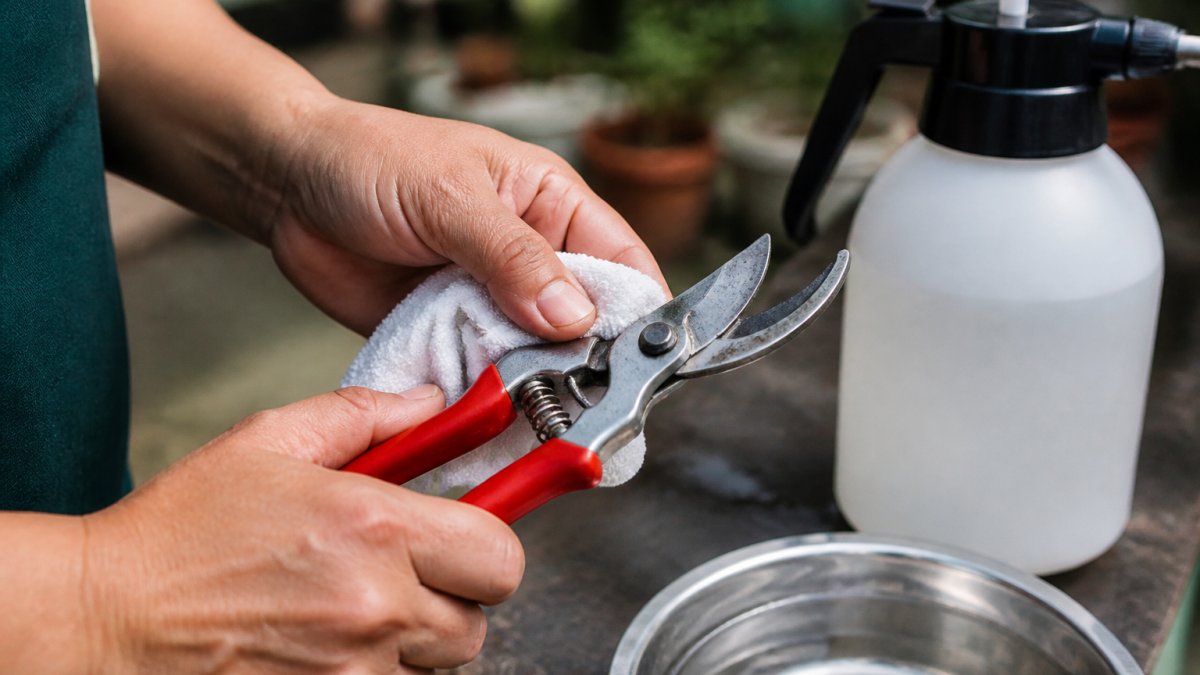
Disinfection is where most gardeners are vague, a quick wipe with 'something' and on to the next plant. If your shears are making rough cuts despite proper technique, diagnose whether your secateurs are crushing stems and causing the damage that spreads disease. Pathogens transfer on tool surfaces, and a single cut on an infected plant can carry enough inoculum to infect the next plant you prune. A consistent protocol matters more than the product you choose.
When to disinfect: a tiered protocol
- Between every plant during routine pruning, especially when moving between different species or between garden beds.
- Between every cut when working on a plant with visible disease symptoms, or when removing material you know is infected.
- Before and after a pruning session, clean off sap and debris first, then disinfect.
- Between properties or garden zones if you prune across multiple sites.
A 30-second wipe is the minimum. For between-cut disinfection on a diseased plant, keep a spray bottle or a cloth soaked in disinfectant within reach so the habit is practical.
Choosing a disinfectant: alcohol vs bleach
| Factor | Rubbing alcohol (70% isopropyl or ethanol) | Diluted bleach (sodium hypochlorite) |
|---|---|---|
| Typical dilution | Use at 70%, not 100%, which evaporates too fast | 1 part bleach to 9 parts water (roughly 0.5% available chlorine) |
| Contact time | 30 seconds is a common working minimum | 30 seconds to 1 minute; longer for heavy contamination |
| Corrosion risk | Low to moderate; evaporates quickly | High, corrodes metal, dulls edges, damages handles |
| Residue | None; evaporates | Leaves salt residue; rinse and dry thoroughly |
| Best for | Routine between-plant and between-cut use | Heavily contaminated tools or a deep clean between sessions |
The practical routine
- Remove debris first. Disinfectant cannot penetrate sap, soil, or plant tissue. Wipe blades and handles with a dry cloth to remove visible material.
- Apply disinfectant. Spray or wipe the blades, the pivot, and the handles, pathogens sit on hands and handles too, not just the cutting edge.
- Respect contact time. Let the product sit for at least 30 seconds. A quick swipe that evaporates instantly does little.
- Dry completely. Wipe with a clean cloth or let air-dry. Moisture causes rust; bleach residue accelerates corrosion.
- Oil the pivot after a bleach session to protect moving parts.
What not to do
- Don't rely on a dry cloth alone when disease is present, it removes debris but does not kill pathogens.
- Don't soak tools in bleach for extended periods; it corrodes metal and damages seals.
- Don't dip tools into a shared container of disinfectant without cleaning off debris first, the solution becomes contaminated.
- Don't skip the handles. Cross-contamination happens as often from hands and handles as from blades.
Cleaning pruning tools between plants to stop cross-contamination
Cross-contamination happens when you carry pathogens from one plant to another on tool surfaces.
Wipe the blades and handles with a cloth after each cut. Remove sap, debris, and visible soil. Sap buildup dulls blades and harbours pathogens.
For routine maintenance between plants, a dry cloth works fine. For plants showing disease symptoms, follow with a disinfectant wipe. This two-step approach keeps tools clean without excessive chemical use.
Keep cleaning supplies at hand. Store a cloth and disinfectant bottle in your pruning kit or apron pocket. The easier you make the habit, the more consistently you'll do it.
ARS VS-9XZ Professional Secateurs - Large →
Cleaning routine for preventing plant disease:
- Wipe blades and handles with a dry cloth after each cut
- Remove sap and debris buildup
- Use disinfectant wipe when moving between diseased plants
- Dry tools completely before storing
- Check blades weekly for damage or dullness
How to sharpen pruning shears for precision cuts
Sharp blades make clean cuts. Dull blades crush and tear tissue, creating wounds that invite infection.
A ceramic sharpener maintains a sharp edge between professional sharpening sessions.

Test sharpness by cutting a piece of paper. A sharp blade cuts cleanly. A dull blade crushes and tears the paper. If crushing occurs, sharpen again.
For more detailed guidance on sharpening technique, learn how to sharpen professional garden shears with step-by-step instructions for maintaining your tools.
Professional secateurs like the ARS VS-8XZ Professional Secateurs feature chrome-plated blades that hold an edge longer and sharpen more easily than budget alternatives.

Disposing of infected plant material correctly
Never compost diseased leaves, stems, or fruit. Pathogens survive the composting process and recontaminate your garden when you use the compost. Bin all infected material in garden waste or household rubbish.
Bag infected material separately if possible. This prevents spores from spreading during transport to the bin. Double-bag heavily infected material.
Burn infected material if local regulations permit. High heat kills most pathogens. Check local fire safety rules before burning.
Don't leave infected material on the ground near the plant. It overwinters in dead tissue and reinfects the following season. Clean up fallen infected leaves and fruit daily during disease season.
Selecting and maintaining tools for disease prevention
Quality tools make clean cuts. Invest in professional-grade secateurs designed for precision pruning.
For maintaining professional pruning secateurs, follow a regular schedule. Clean tools after each use. Sharpen blades when they stop cutting cleanly.
The ARS VS-9XZ Professional Secateurs are made in Japan from high-quality materials. Chrome-plated blades stay sharp longer. Aluminium handles are lightweight and durable.
For larger branches, the ARS Pruning Saw cuts cleanly without crushing. The folding design fits in your pocket.

Store tools in a dry location. Moisture causes rust and dulls blades. Hang them on a wall or store in a tool bag.
Replace worn or damaged tools. A cracked handle or bent blade won't cut cleanly.
Frequently Asked Questions
Can dirty pruning tools spread plant diseases?
Yes. Pathogens on unwashed or unsharpened tools transfer directly to healthy plants. A single diseased plant's sap can carry bacteria, fungi, or viruses to dozens of others if your tools aren't cleaned between cuts. Disinfecting shears after each infected plant eliminates this cross-contamination risk entirely.
How do clean pruning cuts help prevent plant disease?
Clean cuts made with sharp blades close quickly and leave minimal exposed tissue. Ragged cuts from dull tools create open wounds where pathogens enter easily. A precise, smooth cut seals faster, reducing the window for infection. Combined with tool disinfection, clean cuts are your first defence against disease spread.
How often should pruning shears be sharpened?
Sharpen shears every 10-15 hours of active cutting, or whenever you notice the blade crushing rather than slicing cleanly through stems. Dull blades damage plant tissue and increase disease susceptibility. A ceramic sharpener like the Ceramic Sharpener (AUD $15.00) keeps your blades sharp and ready, maintaining the precision cuts that protect plant health.
When should pruning shears be cleaned during pruning?
Clean and disinfect your shears after every cut on a diseased plant, and between each plant during routine pruning. If you're moving between healthy specimens, a quick wipe with a dry cloth prevents sap buildup. For diseased material, use rubbing alcohol or diluted bleach (1 part bleach to 10 parts water) to eliminate pathogens completely.
Clean cuts are the foundation of disease prevention. Sharp tools, proper technique, and consistent disinfection stop pathogens spreading through your plants. Invest in quality secateurs and sharpeners from Toolpro, and make clean cutting and tool maintenance part of your routine. The result is healthier plants and fewer disease problems throughout the growing season.
